
.svg)
How to Integrate Rebolt with Airtable : A Step-by-Step Guide


Tired of handling form submissions, spreadsheets, and disorganised data? Imagine if every response from your online forms could be automatically arranged in a powerful, customisable workspace.
That’s exactly what happens when you integrate Rebolt with Airtable.
Rebolt is a powerful online form builder designed to help businesses collect, manage, and automate form data with ease.
On the other hand, Airtable is a modern spreadsheet-database hybrid that allows you to organize information in a flexible, visual way.
When you integrate Rebolt with Airtable, you can send form responses directly to your Airtable base, creating a powerful system for managing form submissions, leads, registrations, or survey data that are all in real-time.
In the following article, we'll guide you through the process of connecting Rebolt and Airtable step by step, so you can streamline your workflows, eliminate manual data entry, and focus on what matters most: growing your business.
Why Integrate Rebolt with Airtable?
Combining Rebolt’s form creation capabilities with Airtable’s database-like structure unlocks a powerful workflow automation system. Here's why this integration makes sense:
- Real-time data syncing from form submissions to Airtable tables
- Streamlined data management without manual copy-paste
- Collaborative access to form data across your team
- Custom workflows like automatic tagging, notifications, and sorting
- Visual dashboards to track form submission metrics
How to Rebolt Integrate with Airtable - Step-by-Step Guide
Integrating Rebolt with Airtable is a straightforward process, Here's a comprehensive breakdown of each step:
Step 1: Create Your Form in Rebolt
Log in to your Rebolt account and jump directly on rebolt dashboard.

Don’t have an account yet? click on sign-up to create a new account.
Click on the “Create New Form” button.

If you're new to form building, choose from Rebolt’s pre-designed templates to get started quickly. Otherwise, start from scratch and customize every field.

Add form fields as needed such as Name, Email, Phone, or Message, depending on what information you want to collect. Once done, click “Save & Publish”.
Step 2: Set Up Your Airtable Base and Table
Go to the integration section which is shown on the left side. Select Airtable from the list and click “Connect”.

Next, You will be asked to grant Rebolt permission to access your Airtable data. Log in and grant access to link your Airtable accounts.

Don’t have an Airtable account? Visit airtable.com to create one for free.
Go to your Airtable workspace. And create a new base or use an existing one.

Inside the base, create a Table with fields that match your Rebolt form fields.
For example: If your form collects Name and Email, your Airtable table should have “Name” and “Email” columns.
Step 3: Connect Airtable to Rebolt
Once you have finished activating Airtable, return to Rebolt. The linked Airtable account will be identified. Choose the account and select the base you want to integrate with your form.

Now select the table to map your form data. Choose the specific table where you'd like Rebolt to send form responses.

You’ll now see a field mapping interface to Airtable columns. For each Rebolt field, select the matching column in your Airtable table.
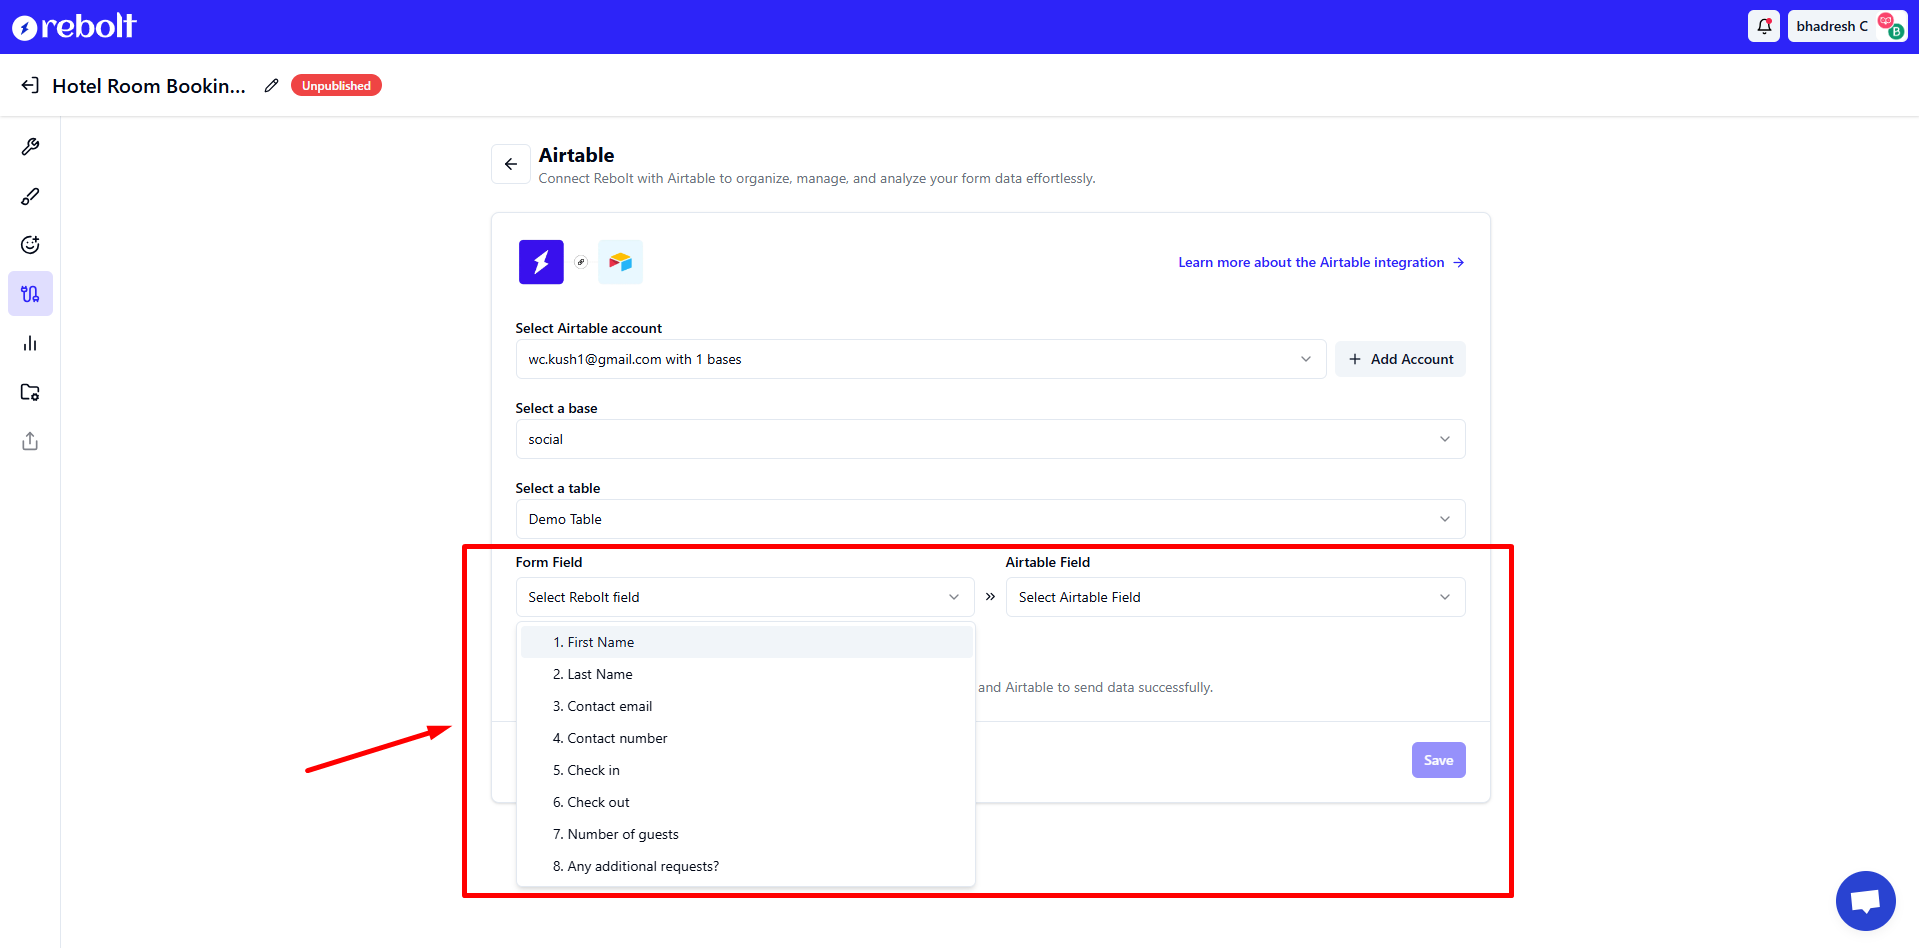
Example:
- Rebolt field “Full Name” → Airtable field “Name”
- Rebolt field “Email Address” → Airtable field “Email”
Note: (Ensure all required fields are correctly mapped.)
After the mapping all the required fields click on “save”.

Step 4: Test & Live Your Form
Now that your form is integrated with Airtable, it’s time to verify everything works.
Open the published Rebolt form, fill out the form using sample/test data and submit the form.

Open Airtable, and open the connected table and check for new data. You should see the submitted data appear as a new record.
Double-check that each field aligns properly and no data is missing or mismatched.
Hurrey, your Airtable integration is successful.
Conclusion
The Rebolt and Airtable integration offers a seamless, efficient solution for automating form submissions and organizing data in real time. By connecting your Rebolt forms to Airtable, you can eliminate manual data entry, reduce errors, and ensure that all your responses are stored in a structured, collaborative workspace.
Whether you're managing customer inquiries, lead generation, or internal processes, this integration empowers your team to work smarter and more efficiently.
Take advantage of the combined power of Rebolt and Airtable today to streamline your workflows and enhance your data management capabilities.
Sign Up your free Account & Create Unlimited Forms
Create highly customizable and user-friendly online forms instantly using Rebolt's drag-and-drop feature.
